Most of the time we do a pretty good job of not having to deal with Weber carburetors, the ne plus ultra Italian tuning instrument, but this week the stars aligned, and we have six of ’em on our collective plate.
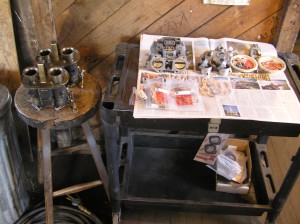
When we do have to deal with carburetors in a major way, step one is always a teardown & cleaning. For this purpose we employ a special machine, known as an immersion cleaner, which uses an air motor to agitate a parts basket at varying speeds in a mildly caustic solution that strips gum & varnish off carburetor parts like nobody’s business. You can judge for yourself its effectiveness by taking a closer look at the brass emulsion tubes, main jets, air corrector jets, idle jets, starter valves & pump jets laid out here for assembly on the right.
That’s an almost infinite number of tuning combinations, and in our opinion they represent both the strength and ultimate downfall of the Weber carburetor.
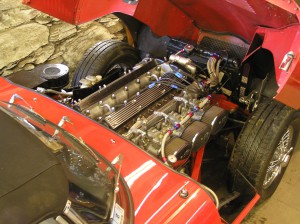
By comparison, the SU HD8 (meaning 2″) carb uses only one metering jet and a choice of either a weak, standard or rich needle to accomplish all that tuning. In our experience, a side draft Weber has a sweet spot within about a 2500 rpm range, and while you’re in it, it’s ‘Oh Baby, Hold On To Your Hat’, but everything outside it is a compromise. In the case of this E-type, they’re working quite well and only represent a slight impediment to stripping off the cylinder head for some valve guide work.
Because we do see ’em from time to time, we keep a very basic kit of gasket sets and jetting for both side draft & down draft Webers on hand.
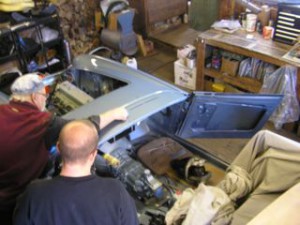
Meanwhile, work has been progressing at a slower pace on this Healey Blue over Old English White early BJ8. In this picture Butch and Gus, who is a guest worker, can be seen marking out the front shroud with masking tape prior to the installation of the windshield. Also visible in this picture is the 5 speed Toyota transmission specified by the owner. It’s a great idea and the ratios match up well, but we’ve been disappointed by the engineering on the release mechanisms on these conversions.
The problem, as we view it, has to do with the basic assumption that the release bearing is concentric with the centerline of the clutch & flywheel assembly.
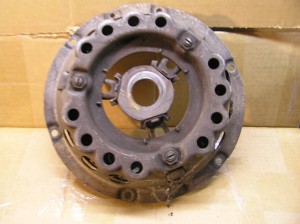
In the picture at left, the thrust plate misalignment of the roller release bearing from another Toyota transmission conversion in an Austin Healey is clearly obvious. The British Motor Corporation, and also Jaguar, knew it wasn’t a given that the release mechanism would run concentrically with the centerline of the flywheel and clutch assembly, so they always used a carbon graphite release bearing to compensate for this elliptical contact pattern.
Every so often we end up repairing a grenaded clutch assembly in a car where the owner has had a “high performance” roller release bearing installed, which has been blown up by the side forces which are the inevitable result of the same clutch contact patch graphically illustrated by this Healey pressure plate. Some ‘Big Improvements’ simply aren’t.
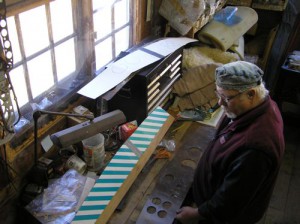
Here’s Butch making a cardboard pattern to check the fit of a dash panel in the Austin Mini van which is an on-going ground up rebuild here at the moment. Checking your engineering work with a pattern isn’t just for interiors.

