Jaguars, Healeys & A Trip to Long Island

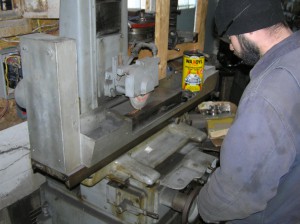
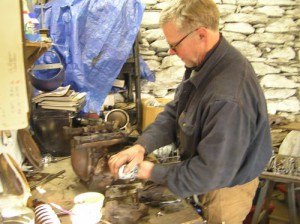
Patrick resizes Jaguar valve adjusting pallets

Patrick resizes Jaguar valve adjusting pallets on the surface grinder. Click to Enlarge

Jaguar valve adjustment is effected by steel pallets which sit on top of the valve and its retainer underneath the cam followers (a.k.a. “tappets”).  Adjusting pallets are supplied in a range of .085″, part number C 2243A, thru .110″, C 2243Z.  An interesting letter and number coincidence, don’t you think ?

Patrick easily hit the range on the exhaust side of the cylinder head, which is clearanced to .006″, but for various reasons, in order to get to .004″ on the intake side he needed a couple of thousandths more clearance than what is available inside  the range.  He found that additional clearance on our ex-War Department Reid Surface Grinder.  If you enlarge the picture you’ll actually see the sparks flying !

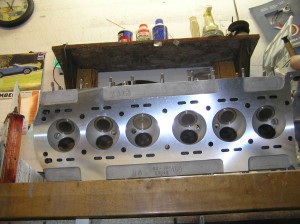
4.2 E-type cylinder head after valve work

What it should look like: 4.2 E-type head after valve work

This is what it looks like when it’s done right.  The valve guides have been replaced with new ones +.002″ on the outside diameter, the old ones were loose!   But these are the old valves properly resurfaced, as is the gasket face of the cylinder head.  Take note that #3 intake valve was previously replaced, 3rd from the left (A six cylinder Jaguar engine is numbered from back to front).  This picture was shot from below the workbench looking up and is also enlargeable.

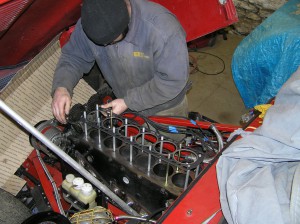
New head gasket & studs

New head gasket & studs

In our “End to End E-types” report last month there is a picture of Warner helping to wrestle the cylinder head off this engine.  It was a situation which was no doubt exacerbated by the relatively poor condition of the old cylinder head studs.  These are new studs and also a new Payen head gasket, we won’t use any other.  The difference was immediate and obvious: Patrick was easily able to slip the cylinder head back into postition by himself, as you can see here.

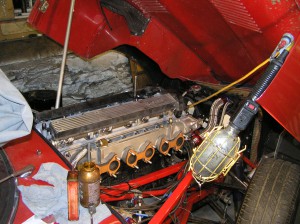
4.2 head with Weber intake manifold

4.2 head with Weber intake manifold

Our next steps will be to reinstall the 45 DCOE sidedraft carburetors using a set of soft mount kits.  The paper gaskets previously fitted were of dubious sealing quality.  A soft mount kit, if you’re wondering, is a plastic spacer block, grooved to take an o-ring on each side, with the carburetors retained on the manifold studs by nylon locking nuts and deformable plastic washers, thereby reducing the clamping loads which sometimes lead to deformed mating surfaces, which in turn lead to vacuum leaks and poor performance.

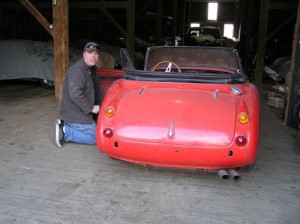
An Austin Healey 3000 BN7

An Austin Healey 3000 BN7. Click

Next week we’re going to have a few things to say about our two on-going Austin Healey 3000 restorations.  Butch is still hard at work on an early BJ8 car, while Warner is just beginning the build up on this two seater.

Meanwhile, earlier today I hustled over to Port Jefferson, Long Island to retrieve an MG TD which last turned a wheel in 1985.  It’s a well known car out on the Island, at least to the old timers !

Aboard the Port Jefferson Ferry

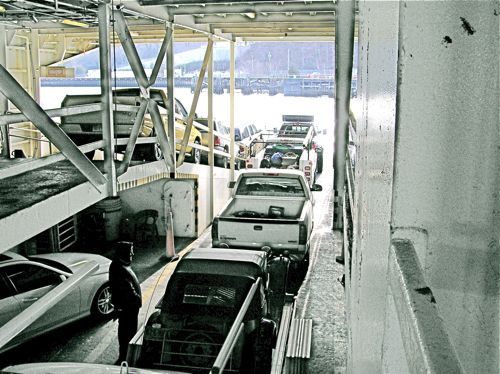
Leaving Long Island on the Port Jefferson Ferry

Posted in This week at the shop | Comments Off on Jaguars, Healeys & A Trip to Long Island

Another Year Over, Another Year Wiser

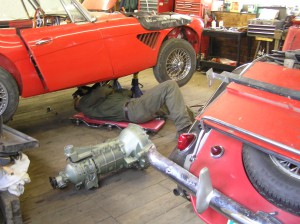
Warner pulls an Austin Healey Transmission

Warner pulls an Austin Healey transmission

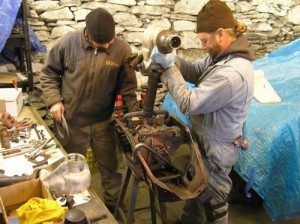
On Thursday the 22nd I had some deferred maintenance taken care of at BMH which puts me on light duty for awhile, and on Friday Patrick and Warner transitioned back into the shop to help us start grinding thru our seasonal backlog.  This is the Austin Healey which we retrieved from Westport, Massachusetts early last week.  Warner got it running and out for a road test Tuesday, but try as he might, he couldn’t get the clutch to break loose in the yard, so he brought it back in and hauled out the transmission and took out the clutch.  It was a new clutch which had been sitting for some time.  This can be a prescription for trouble because the clutch linings soak up moisture like crazy when they’re new and fuse to the pressure plate & flywheel.

Gravity defying clutch disc

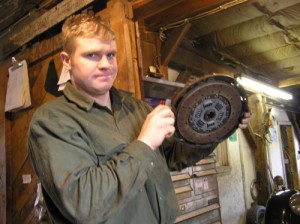
Amazing gravity defying clutch disc

In this picture Warner is holding the clutch assembly upside down but the disc is still stuck tight to the pressure plate.  This is another strong argument for keeping a dehumidifier going in your storage garage, or even better, driving your car every chance you get. It’s less of a problem once a clutch has accumulated some milage.  Presumably the glazing of the linings, a completely normal condition, tends to seal out moisture.

Patrick & Steve assemble an E-type IRS

Patrick & Steve Assemble an E-type IRS

While Warner was wailing away upstairs, Patrick & Steve were methodically assembling the Independent Rear Suspension unit for the red E-type downstairs.  I am going to resist the temptation to wax eloquent about what an elegantly simple  mechanical device this is actually.  It will suffice to say that in 1961 it was a couple of light years ahead of what anyone else was doing.  Fifty years on it’s still a pleasure to see how right it is

Patrick & Steve accessing front drivehshaft hardware

TEAMWORK: Patrick & Steve access front driveshaft hardware

Warner test his work

ROADWORK: Warner tests his handywork

Warner lights ’em up on a frosty morning.  Clutch & TX back in the car, he’s eager to see how it’s going to perform out on the road Thursday morning.  After returning from our standard five mile road test he had a whole new punchlist to work through.

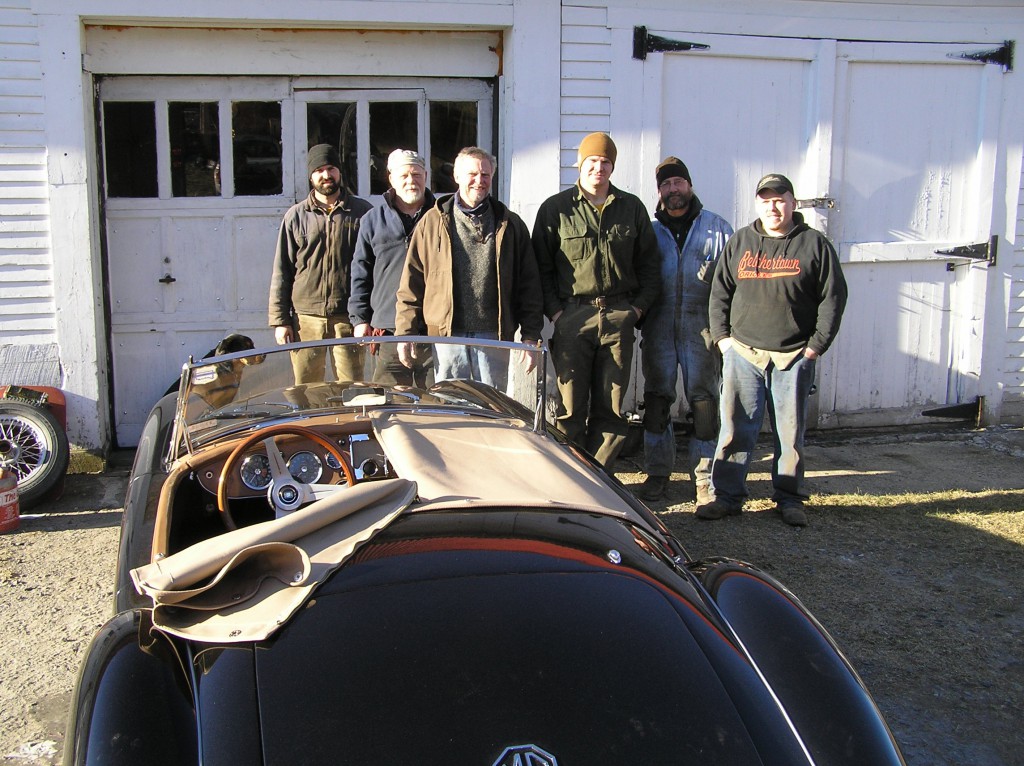
Our UPS driver Jim Coffey snapped this picture of the six of us this morning.  We don’t have any wine or cheese tastings planned in the New Year, nor do we have any interest at all in servicing your other European prestige or exotic car.  In fact it doesn’t matter whether your garage holds one car or six.  However, if you’re passionate about your british sports car and like to receive real value for your hard earned money, then there are some things we should talk about in 2012.

This is our last post of the year.  May the next year be as good to us all.  David Clark

Patrick, Butch, David, Warner, Steve, John

Patrick (with Stumpy), Butch, David, Warner, Steve, John

Posted in This week at the shop | Comments Off on Another Year Over, Another Year Wiser

Field Work

Jason Marechaux inspects an Austin Healey 3000 Mk III

Jason Marechaux inspects an Austin Healey 3000 Mk III

It’s been a busy week for our truck & trailer.  Friday night I slipped into Manhattan and retrieved a TR6 from the East Side, and Sunday night I headed down thru Worcester and Providence to fetch this Austin Healey in Westport, Massachusetts.  As luck would have it, Jason & Eddie  from East Coast Collision & Restoration showed up just in time to make a spot inspection before we covered it up until we start to put it in running order very early in the new year.

We’ve also had a very nice MG TF delivered into our hands on Wednesday.

John has nearly completed a complete hydraulic overhaul on the Morgan 4/4 pictured here last week.  He’s onto the electrical work including an ignition tuneup, and if the weather holds off next week, we’ll be out on the road with it for testing and evaluation

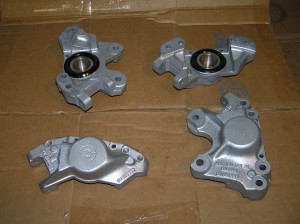
Jaguar E-type Girling rear calipers

E-type rear calipers after reconditioning

Right now Butch is being greatly challenged by the fresh air tubing in the Healey Blue over O.E.W. BJ8 seen here previously.  Expect a fuller report on that next week.

Meanwhile, Steve has been methodically working thru the E-type IRS.  Here are the same calipers you saw him taking apart last week cleaned up and assembled with stainless steel caliper pistons.  If we can presume that this car will now be on a Sports Car Services maintenance schedule where the brake fluid is changed completely every two years, it will be a very long time before these components will be seeing another major servicing.

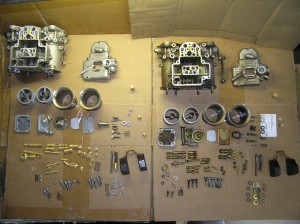
40 DCOE carburetors, before & after

40 DCOE carburetors before & after. Click to Enlarge

These are the 40 DCOE Webers which were also on Steve’s ‘do-list’ recently.  On the right is one carburetor before cleaning:  Take a close look at the float chamber bottom cover just about in the center of the picture, it’s a mess.  The carburetor on the left has just been rinsed and dried after its trip thru the immersion cleaner.  In our experience there is no better way to get carburetor parts as thoroughly clean as what you see here, and we employ the same cleaning method very extensively when we’re prepping engine parts during a rebuild, too.

Last week we picked up two in-line six cylinder engines from River City Machine, another 4.2 E-type, and an MGC.

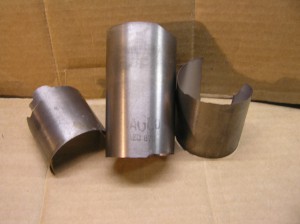
AEC 879 cylinder liner bored out of an MGC BLOCK

AEC 879 factory installed liner from an MGC. Click to Enlarge

For any number of reasons it’s sometimes necessary to install a liner in a cylinder bore.  this seems to happen most commonly when a cylinder wall cracks because of overheating, or when a block has reached its maximum rebore size and is sleeved back to standard.  We got a call from River City Machine in White River Junction last week because the .030″ oversized cylinder block had already been sleeved in all six cylinders.

Working methodically, Wayne bored out the sleeves until they simply collapsed and fell out.  Can your automotove machine shop do that ?  He retrieved this one, and as you can easily see, it carries the genuine factory part number of AEC 879… a cylinder block almost certainly sleeved by Austin Engines Branch.  While we’re used to encountering oversized camshaft & main bearing tunnels in the Ford Kent engines like the one fitted to the Morgan 4/4 we’re working with, it’s the first time we’ve seen  a BMC cylinder block where they didn’t get it right the first time.  What kind of wonderful story explains what happened here ?

Posted in This week at the shop | Comments Off on Field Work

Morgan, Jaguar & Holstein

Morgan & Mini

Morgan & Mini

John has been working on the MGC GT recovered from Fitchburg about a month ago.  It’s running now and it’s smoothness even after an eight year layoff is uncanny.  As the owner commented, “An inline six is a wonderful thing, isn’t it ?”   Wednesday night I was out retrieving two of them from River City Machine in White River Junction about which there will be more to say next week, including some secret history from 1968 recent unearthed by Wayne & Randy while they were working on another MGC engine for us.

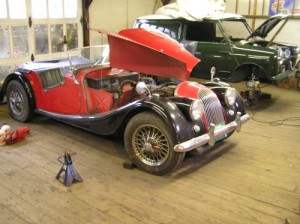
On my way back from White River, I plucked this two toned Morgan 4/4 off a side hill in Windsor, Vermont.  It’s quite a nice car, actually.  John is now fully engaged in a complete brake & clutch hydraulic overhaul on this Ford Kent 1500 engined car.

Stripping the inboard brakes off the differential assembly

Stripping the inboard brakes off the differential assembly. The diff is upside down

Meanwhile Steve and I ran a tag team event on the Jaguar IRS unit from last week.  After I broke down the IRS unit, I handed the subassemblies off to Steve for further dismantling and clean up.

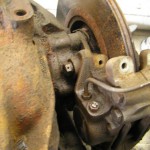
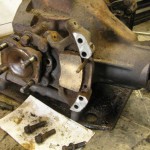
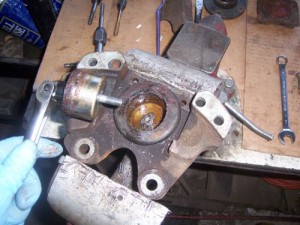
The dismantling was complicated by two stubborn pairs of caliper mounting bolts.  Because of their location, it’s not possible to get a box wrench all the way around them, necessitating “Plan B” which is to unbolt  the outside half of the caliper, which allows removal of the brake rotor and access to the caliper mounting bracket hardware. This caliper was coming apart anyway for overhaul, as will soon be obvious

Poor access to caliper mounting bolts

The Problem

Brake caliper outer half removed while on differential

The Solution

Plan “B” put into action: The caliper mount bracket is removed with the inner half of the caliper

Here’s the next hurdle, Sticking brake caliper pistons.  We have a special tool for removal of caliper pistons, but if they’ve been frozen in place long enough, a more drastic strategy is sometimes called for.  We pick out the center of the caliper piston as nearly as we can,  drill a hole thru it and tap it 5/16″- 24 (tpi) and use a bolt as an extractor.

Caliper piston removed by drill & tap method

Steve pulls a caliper piston by the drill & tap method

Steve took this picture as he extracted the caliper piston.  You can do this at home if you have a tap & die set.  What comes next for this caliper is a wash up and a trip thru our glass bead cabinet, followed by another session with the 5/16″ & 3/8″ -24 taps to clean the threads.  After that it’s the immersion cleaner to get everything inside scrupulously clean, and finally a coat of paint before reassembly.

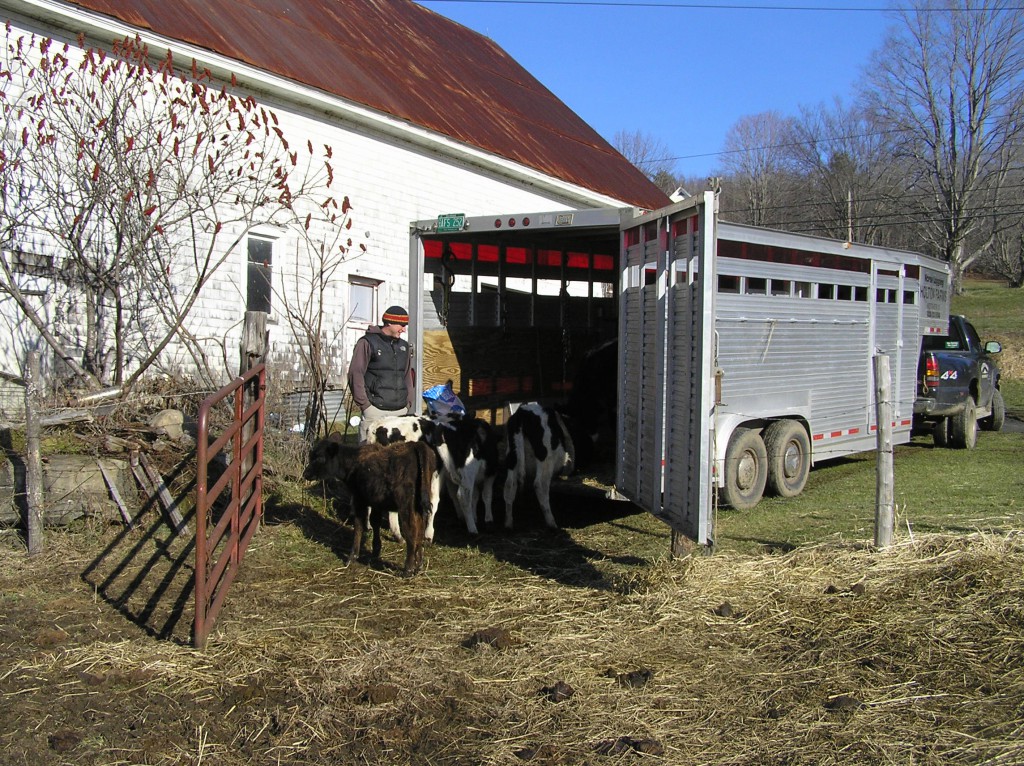
Seth Holton loaded up his Holstein Heifers on Tuesday.  He’ll be wintering them over at Holton farm in Westminster.  After feeding them twice a day for the last month or so I’ll be kind of  missing them.

Seth Holton's holstein heifers depart for winter pasture

Seth Holton loads up his holstein heifers Tuesday

Posted in This week at the shop | Comments Off on Morgan, Jaguar & Holstein